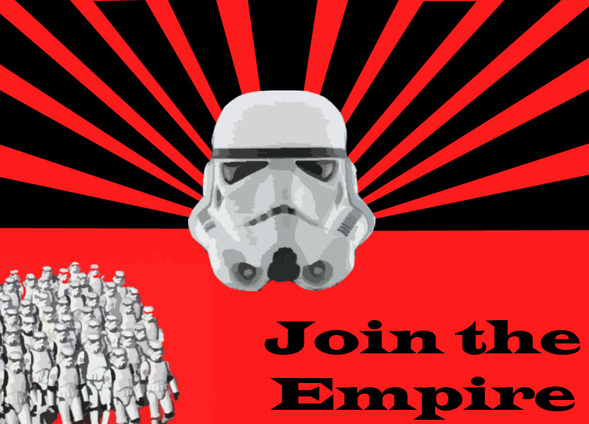
Project 1: Join the Empire
1. Create a new layer then.
2. While on the new layer, use the control backspace shortcut to make the background a dark red. Also, switch your foreground
color to black.
3. Then create a new layer.
4. Then go to the view tab, go to show and select grid.
5. Then using the pen shape tool, you create rays of black sunshine from the horizon up.
6. Create a new layer. Select the text tool and select the "Wide Latin" font. Then in the bottom left hand corner you write "Join the
Empire" in size 48 font.
7. I then went to the internet and found the picture below of stormtroopers walking. Copy this image and paste it into your photoshop document. Then using the pen tool you select how many stormtroopers you want to be in the picture. While still activated on the stormtrooper layer, go to filter and select "cutout". Then using the sliders on the right put the number of layers at 8, the edge simplicity at 0, and put the edge fidelity at 1. Place the stormtroopers in the bottom left hand corner.
8. Create a new layer. I then went to the internet and found the picture below of the stormtrooper helmet. Copy this image and paste it into your photoshop document. Then using the pen tool you select the helmet.While still activated on the stormtrooper helmet layer, go to filter and select "cutout". Then using the sliders on the right put the number of layers at 8, the
edge simplicity at 0, and put the edge fidelity at 1. Place the helmet in the center of the image where the black rays meet
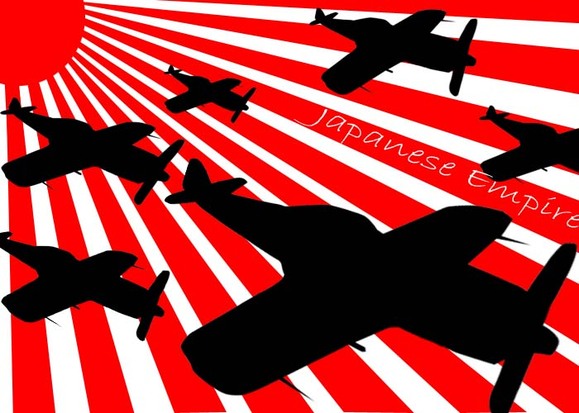
Project 2: Kamikaze
1. Create a new layer
2. Using the Eliptical marquee tool create a red circle in the upper left corner of the image.
3. Replicating the Japanese flag below, use the shape pen tool to create red rays extending across the whole background.
Then compress all the red rays into one layer using the merge visible button under the layers tab.
4. Using the pen path tool, select the shape of the airplane below. Right click then select "make selection" and press ok. Then using the Control Backspace shortcut make the plane shape black.
5. Use the control J shortcut to copy the black plane 5 times. Place these different planes(Using the move tool) around the picture. Then, using skew and scale under the edit-transform tab, make the planes into different sizes.
6. Using "Bradley hand ITC" font, write out "Japanese Empire" in size 26.56 pt font. Then use the sc
Project 3: The sun Never Sets on the British Empire
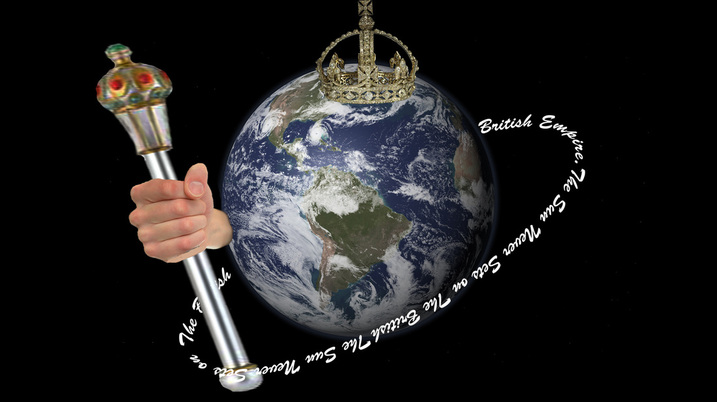
1. Open the picture of the Earth(found below) in a new document
2. Create a new layer and copy and paste the picture of the British crown(found below) and place it on the top of the Earth. Use the eraser tool to get rid of all the black in the crown picture.
3. Open up the picture of a man holding a microphone and use the quick select tool to select the hand and the part of the arm that shows skin. Use the move tool to drag the hand onto a new layer on your earth document and place the hand at 9 o'clock with a 20 degree angle to the left.
4. Open up the picture of the jeweled staff below in a new document, use the pen tool to select the jeweled staff and drag it to a new layer on the earth document using the move tool. Move this layer below the hand layer so that it looks as if the hand is grabbing it.
5. Select the ellipse tool which is below the "Path selection tool" and create an orbit around the Earth that is at a 45 degree angle.
6. Select the type tool and click on the orbit that you just created and type "The Sun Never Sets on the British Empire" in font Brush Script STD with size font 60. Copy what you just wrote and paste it on the path once more. Then use the control J short cut _____ to copy the layer.
t the eraser tool and click on the image, click OK when it says to rasterize the
image. Then use the eraser tool to erase the text that goes behind the earth and
the staff to make it look like it is actually orbiting the globe.
K when it says to rasterize the image. Then use the eraser tool to erase the text that goes behind the earth and the staff to make it look like it is actually orbiting the globe.
8.
Portfolio 4: a change of Colors
1: Create a new document of 8' by 5' resolution 150.
2: Use the elliptical marquee tool to create an oval shape in the bottom third of the image. Make the oval a gray color. This oval will serve as the support for the flag pole.
3: Use the rectangular marquee tool to make a brown "ground" at the that covers up half of the gray oval. Use the sponge filter to make it look more like ground. Use the pen tool to select one of the people doing the Nazi salute below. Place it into the document and use the control backspace shortcut to make it a silhouette.
4: Create a flag pole using the pen tool and the elliptical marquee tool.
5: Use the ellipse tool to create the string of the flagpole. Then add a pencil stroke and delete the work path.
6: Open the flag of Germany onto a different layer. Use the pen tool to select the flag and copy the flag.
7: Paste the flag onto eleven new layers.
8: Use the warp tool to warp the flag into different shapes, making it look like its blowing in the wind.
9: After the third flag layer, on each layer start moving the flag slowly down the flag pole.
10: Once the flag reached the bottom I switched to the Nazi flag and slowly moved it up the flag pole, repeating the flag movement with the wind.
11: Once the flag has reached the top, create the animation by putting each flag position on its own frame with a .1 second difference.
Portfolio 5: Alexander the Great?
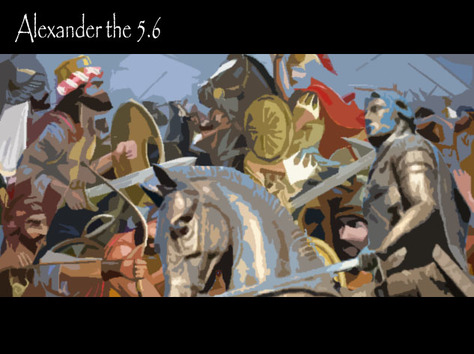
1: Open up the picture of the battle scene(found below) in a new document and unlock the layer by double clicking on the layer.
2: Create a new layer.
3: Go to View-Show-Grids and make the top four and bottom four rows black.
4: Select layer 0 and add the cutout filter(number of levels:6, edge simplicity:4, Edge Fidelity:2).
5: Open the picture of Alexander's statue in a new document, use the pen tool to select the statue and use the move tool to bring it onto the other document. Add the cutout filter(number of layers:7, edge simplicity:1,edge fidelity:1)
6: Select the text tool and type "Alexander the 5.6" in Papyrus font size 40.
7: Move the layer with the black rows to second to the top and put the text layer as the top layer.
Portfolio 6: The Imperials
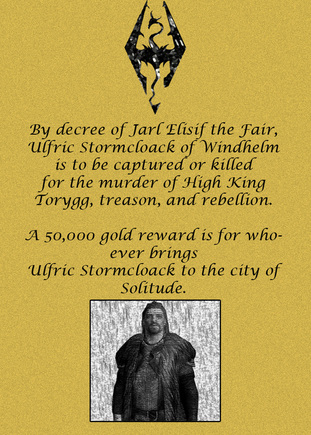
1: Create a new document 7'x5' and make it a khaki color.
2: Add the Film grain filter to the khaki layer.
3: Use the pen tool to select the dragon symbol and place it onto a new layer. Use the burn tool to make the symbol appear darker.
4: Add the Fresco filter to the symbol to make it look like it was painted on.
5: In font Lucida Calligraphy size 17 write "By decree of Jarl Elisif the Fair, Ulfric Stormcloack of Windhelm is to be captured or killed for the murder of High King Torygg, treason, and rebellion. A 50,000 gold reward is for whoever brings Ulfric Stormcloack to the city of Solitude." in a text box and place it below the dragon symbol.
6: Use the rectangular marquee tool to select a small square in the bottom half of the document, below the writing. Add a pattern overlay from the "artists surfaces." Then add a thin black stroke to the image.
7: Copy the picture of Ulfric Stormcloack (found below) and place it in the document. Use the eraser tool or the pen tool to only have Ulfric left. Place him in the pattern overlay square. Desaturate the image of Ulfric and add the Rough Pastels filter.
Portfolio 7: SPQR
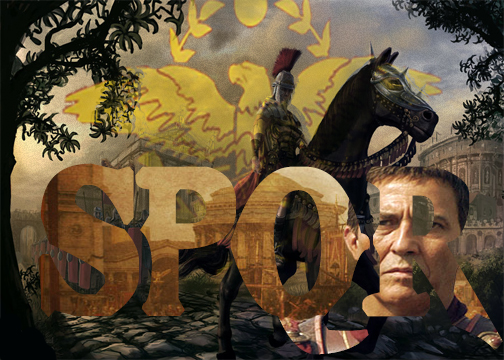
1: Open a new document 5'x7'.
2: Open the SPQR symbol in a new document. Use the pen tool to select the gold symbol and drag it onto the document.
3: Add a large black outer glow to the SPQR symbol.
4: Place the image with the horse and the soldiers onto a new layer in the document.
5: Use control A to select the layer and copy it.
6: Add a layer mask to the SPQR symbol layer.
7: Select the layer mask using Alt left click, and click paste.
8: Use the text tool and write "SPQR" in large capital letters. Make it fill up the bottom half of the document.
9: On a new layer, paste the image of Julius Caesar. Position it in the bottom half of the document.
10. Create a clipping mask, position Julius' face so it is in the R.
Portfolio 8: Mongol Empire

1: Create a new document of 7' by 7'. Use control backspace to make the background black.
2: Create a new layer and make it black
3: Using "Brush Script STD" size 60 write "The Largest of its Kind". Then create a new layer and make it black.
4:Using "Brush Script STD" size 60 write "Unmatched by All". Then create a new layer and make it black.
5: Using "Brush Script STD" size 60 write "The One and Only". Then create a new layer and make it black.
6:Using "Brush Script STD" size 60 write "Mongol Empire". Then create a new layer and make it black.
7: On the new layer paste the picture of the Mongol Soldiers. Use the pen tool to select the two horseback riders on the far left. Place these two horseback riders in the top left corner of the layer.
8: On the layer paste the picture of the Mongol empire. Use the pen tool to only select the empire part, use the eyedropper tool to select the color of the empire. Use the pen tool to cover up all of the names like "Mongolia", "China", "Tibet", the "Aral Sea" etc.
9: Using "Brush Script STD" size 60 write "Coming to your Village Soon"
and place it in the bottom half of the layer.
10: Open up the animation tab under windows and create nine frames. On the first layer you leave it black, on the second you put the layer with "The Largest...", on the third you leave it black, on the fourth you put the layer with "Unmatched by all", on the fifth you leave it black, on the sixth you put the layer with "The One and Only", on the seventh you leave it black, on the eighth you put the layer with "Mongol Empire", on the ninth layer you put the final layer with the picture of the empire.
11: Use the tween tool to put 3 layers between each frame.
Portfolio 9: In a Bottle
1: Open a new document with width 7 in and height 5 in with a resolution of 72. Use the control backspace shortcut to make the image a teal color. Use the rectangular marquee tool to create what look like paintings hanging on a wall.
2: Open the picture of the bottle(found below) in a new document and use the Magnetic lasso to select and use the move tool to drag it onto the blank document. Turn the bottle 90 degrees to the left.
3: Use the rectangular marquee tool to create a brown square the covers the bottom part of the image. Use the smudge stick filter to make the brown square look more like a wood table.
4: Using the pen tool, create multiple blue layers with varying levels of opacity that look like waves in an ocean. Combine these layers into two layers.
5: Use the burn tool to make the water layers look darker and more ocean like.
6: Go to the bottle layer and click on filter-render-lens flare, in the top left hand corner of the bottle use the lens flare tool to create a sun affect.
7: Go to the boat layer and use the dodge tool to make the front half of the boat "lighter", continuing the affect of the lens flare.
8: Go to the animations tab under windows. Create two layers in the animation, one for each ocean wave layer you have.
Portfolio 10: Russian Empire(Crimea river)
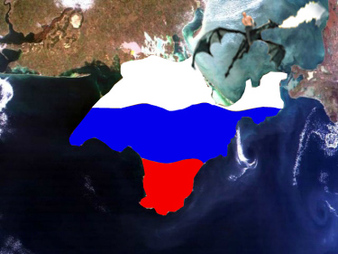
1: Open the picture of Crimea(found below) in a new document.
2: Open the picture of the flying dragon(found below) in a new document. Then use the pen tool or the quick selection tool to pull out the image of the dragon. Use the move tool to drag it onto the Crimea document.
3: Open the picture of Vladamir Putin riding a horse(found below) in a new document. Use the pen tool or the quick selection tool to pull out the image of Vladamir and place it into the crimea document.
